To traffic your Signal code via Google Ad Manager (GAM), you will need to use a 1x1 ad unit. You can either set up a new 1x1 ad unit, or you can edit an existing one.
Existing ad unit
These steps will help you traffic the Signal code via a line item targeted to an existing 1x1 ad unit. As a best practice, we recommend using a 1x1 ad unit not targeted by any other line item.
-
Use an existing 1x1 ad unit
-
Find the line item targeted to the 1x1 ad unit in GAM by navigating in the Delivery section or searching for that line item
-
Add the creative that will be set up for the 1x1 line item
-
If you're using a new creative, use the custom creative type to deliver the Sovrn Signal code
-
Be sure to uncheck "safe frames" which is usually checked to enabled by default.
New ad unit
-
Create the unique ad units targeted to custom ad unit size 1x1 to enable the desired custom behavior (ex: Sticky ad units, reload, etc.)
Warning: All other “Ad Unit” settings can be left to default. Do not change anything here.
-
Do not include any refresh functionality. Signal will take care of that on its own.
-
This new 1x1 ad unit would ideally not be targeted by any other regular line items in your GAM network.
-
For easy reference, we recommend that the code is the same as the name.
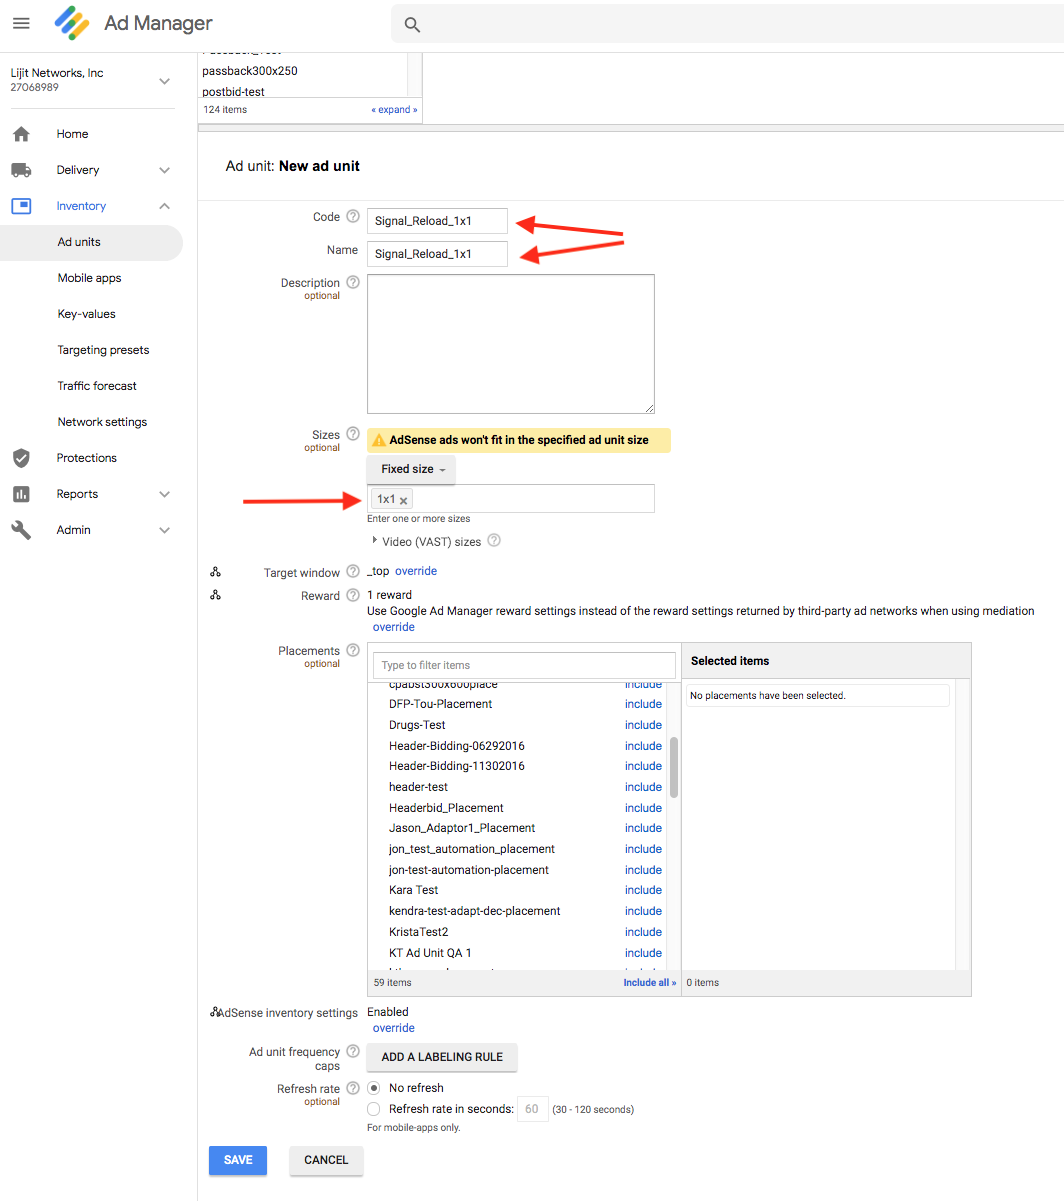
Generating the 1x1 ad unit code
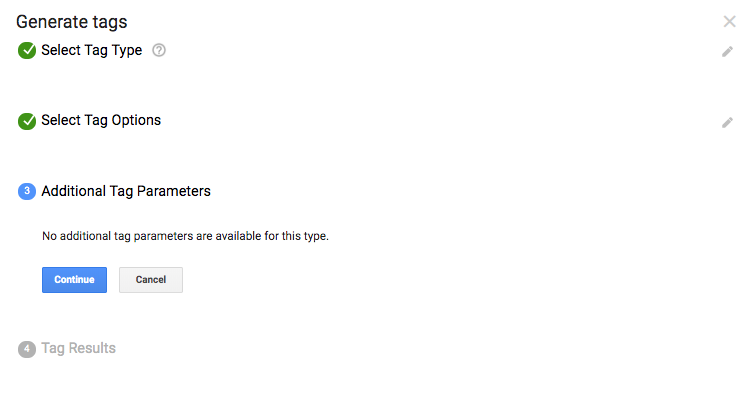
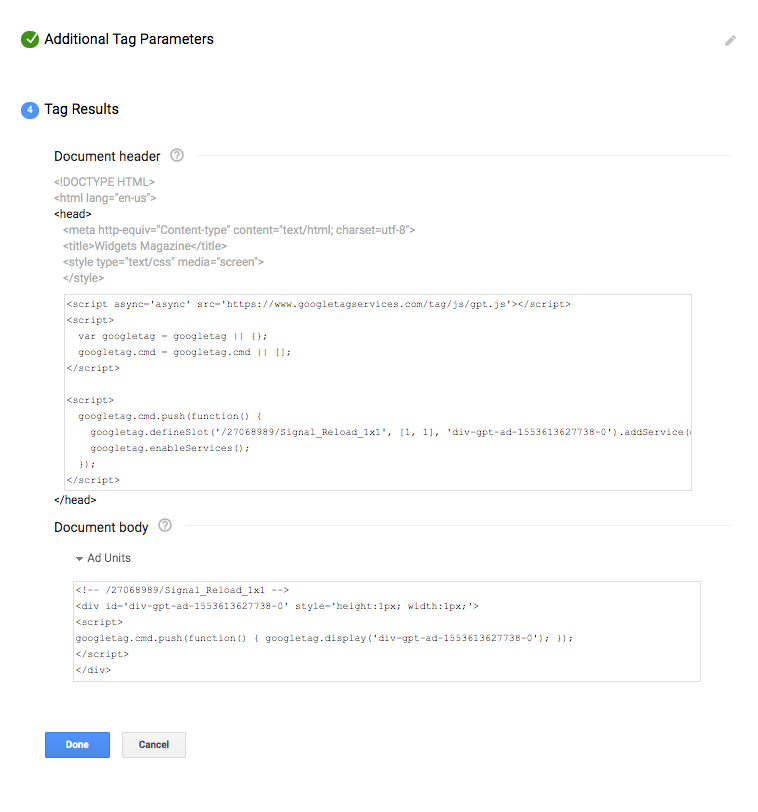
These instructions will help you generate GAM GPT ad unit code to place on the header & body of site page(s).
-
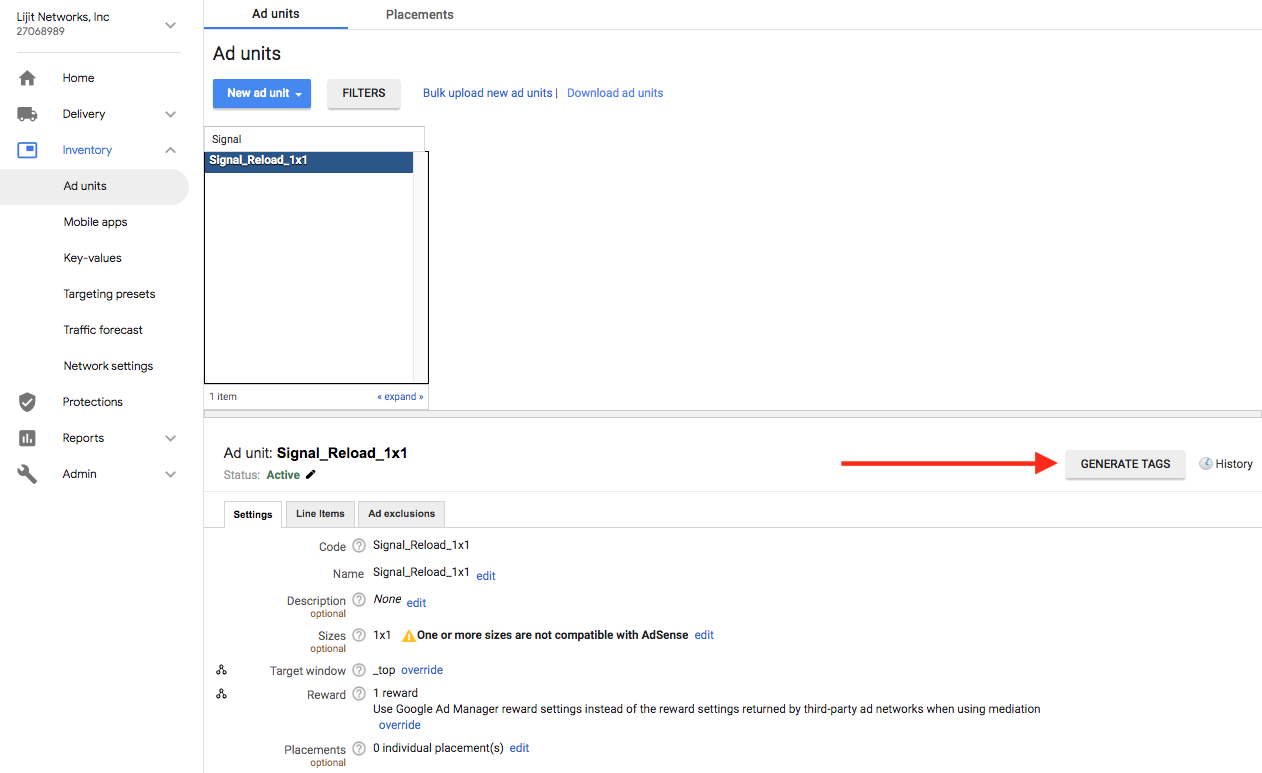
For Signal reload functionality you need to start in the Ad Units screen. Open up the ad unit that you want to edit and click "Generate Requests"
-
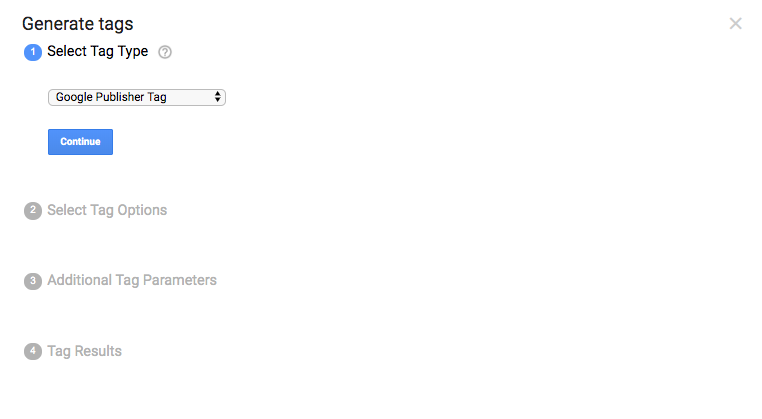
Select Google Publisher Tag and click Continue.
-
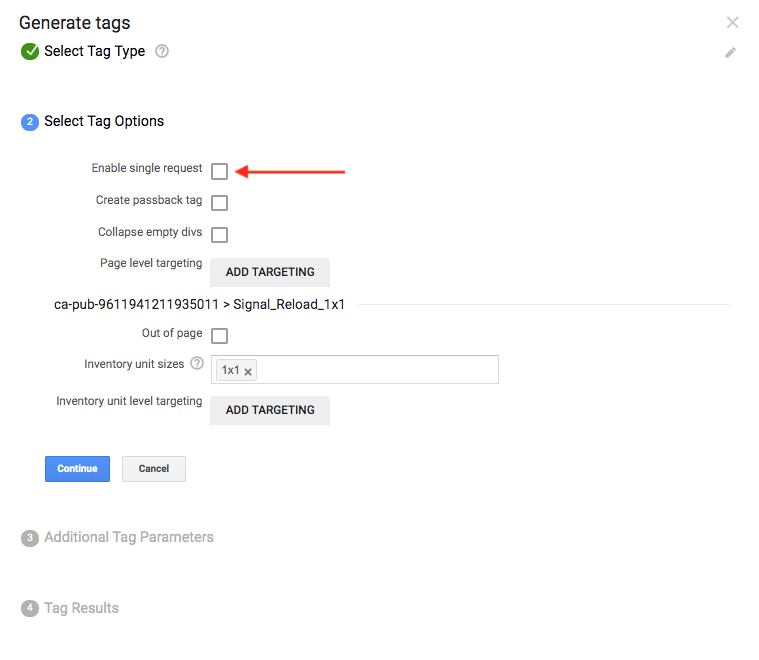
Uncheck “enable single request” for the 1x1 ad unit to be called properly upon reload instead of the initial pageview.
-
Leave all the other default options in place on the last screen where you can copy the generated code and paste the header code into the <head> of your web page and the body code into the <body> section of your web page.
Creating GAM line items
-
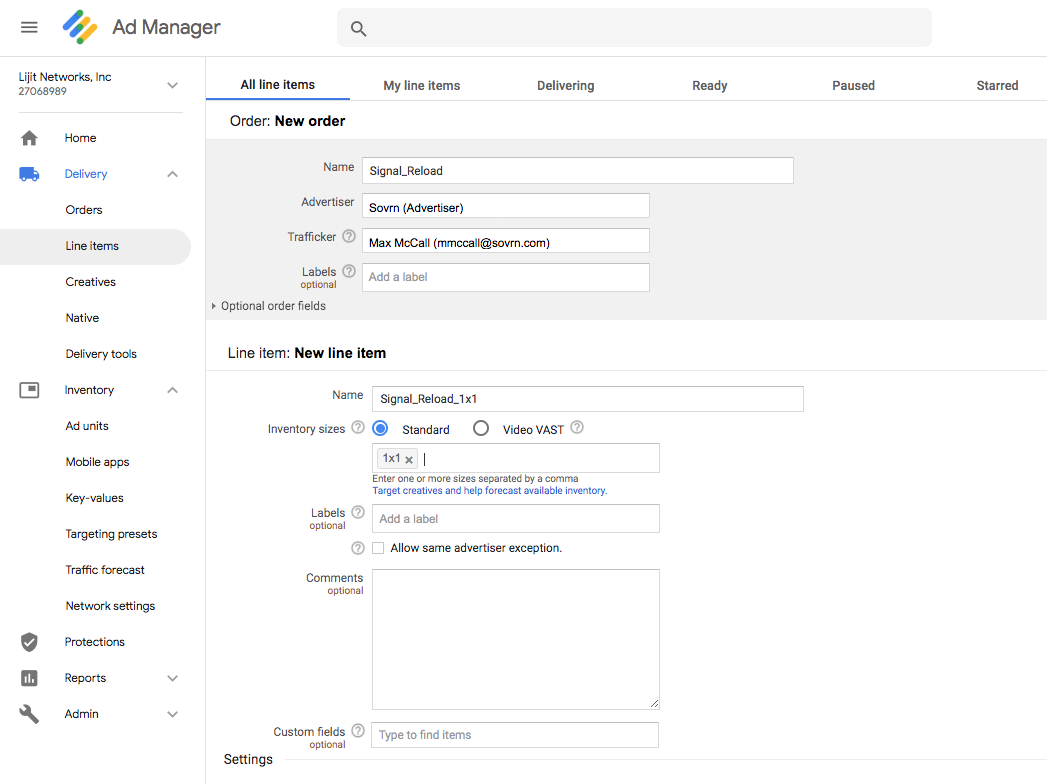
Create a Line Item
-
Type = Sponsorship
-
Targeting 1x1 size
-
Start / End Dates
-
$0.00 CPM (Our recommendation is to start at $0.00)
-
Target the 1x1 ad unit created in the previous steps.
-
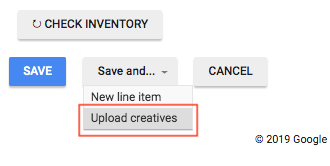
You can add your creative (where you will paste the 3rd party ad code, ex. Sovrn Signal) to the line item as a part of your save process.
-
Or you can just save the line item and add the creative separately or at a later time.
Setting up your GAM line item creatives
-
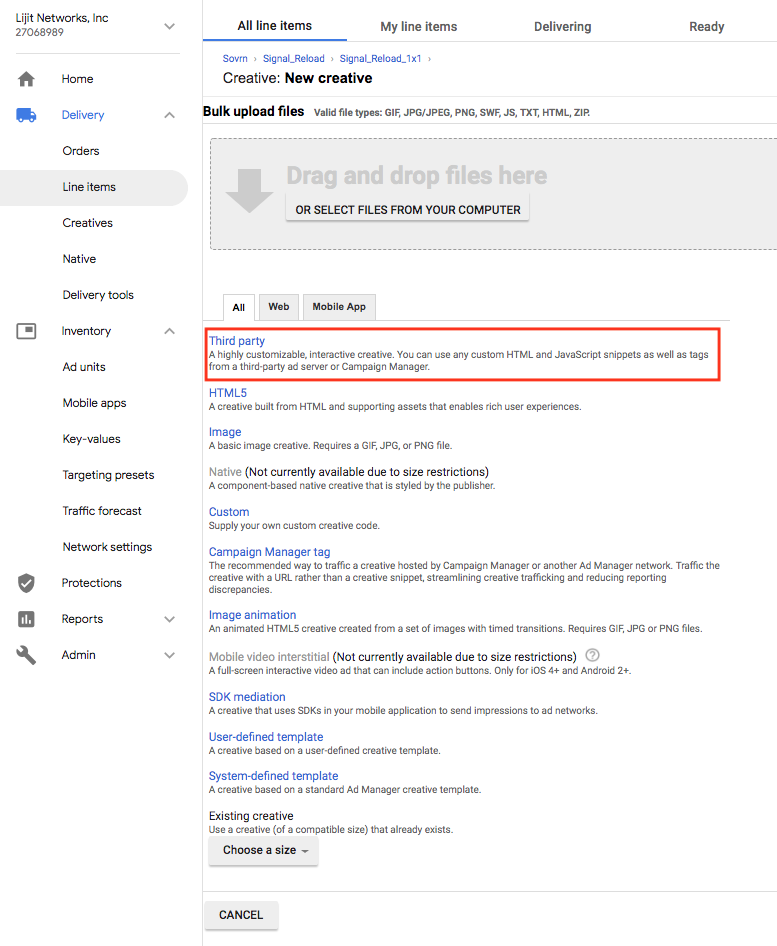
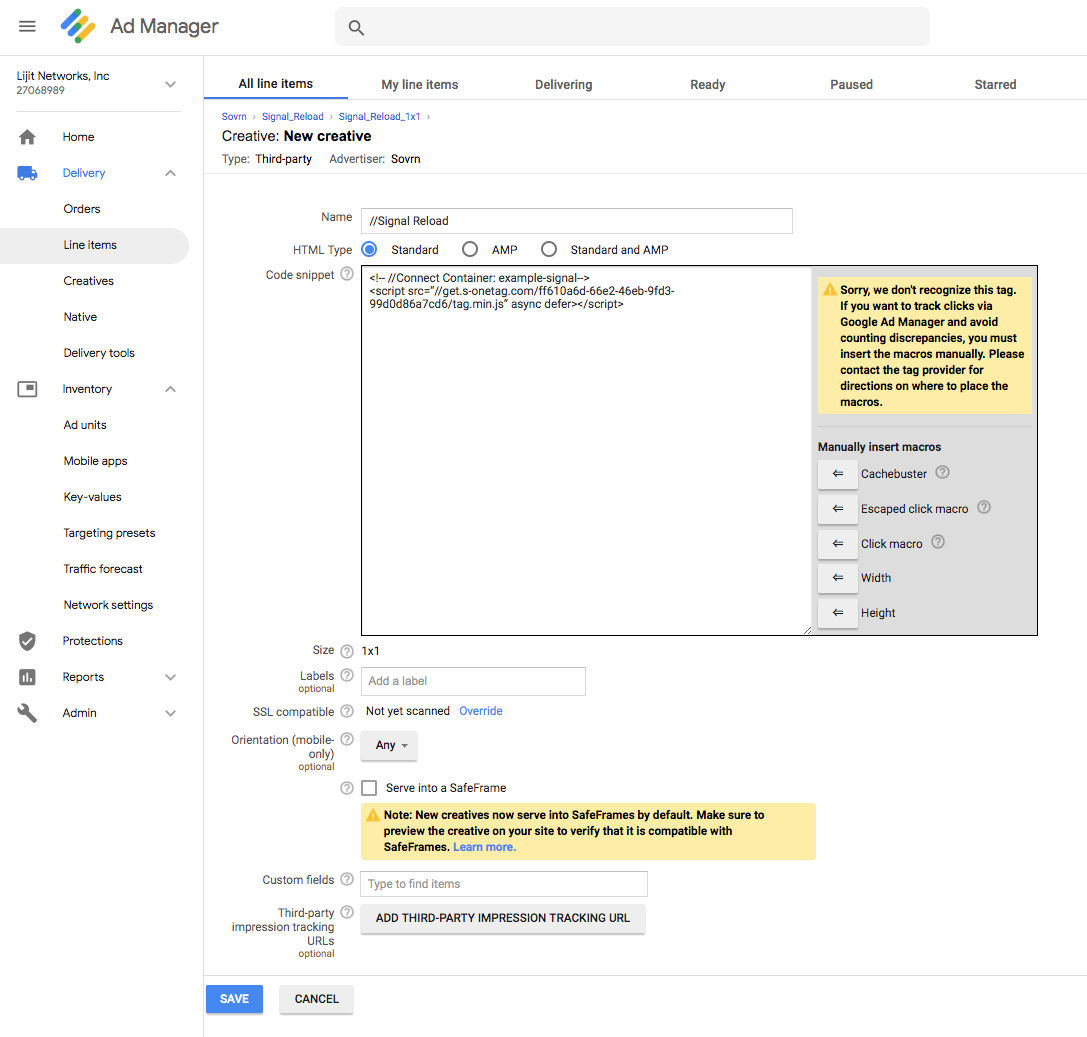
Set up the creative as third-party creative, give it a name, insert the Signal script tag provided by Sovrn into the creative settings, and uncheck “Enable SafeFrames”
-
Once the ad unit code is on the site and the Line item or Order that the line item is organized under is approved, then it should begin delivery typically within the hour
Implementing Signal through an OOP Page Slot
The below instructions are for those delivering Signal via an Out-of-page (OOP) ad unit. While this is similar to the 1x1 implementation method, there are some small variations that are important to note.
-
Even though Out-of-page (OOP) units are usually 1x1 in size if you're delivering Signal through an OOP unit, please ensure you define the size as only OOP in the line item settings.
-
In ad unit targeting, select the OOP units you would like to target.

-
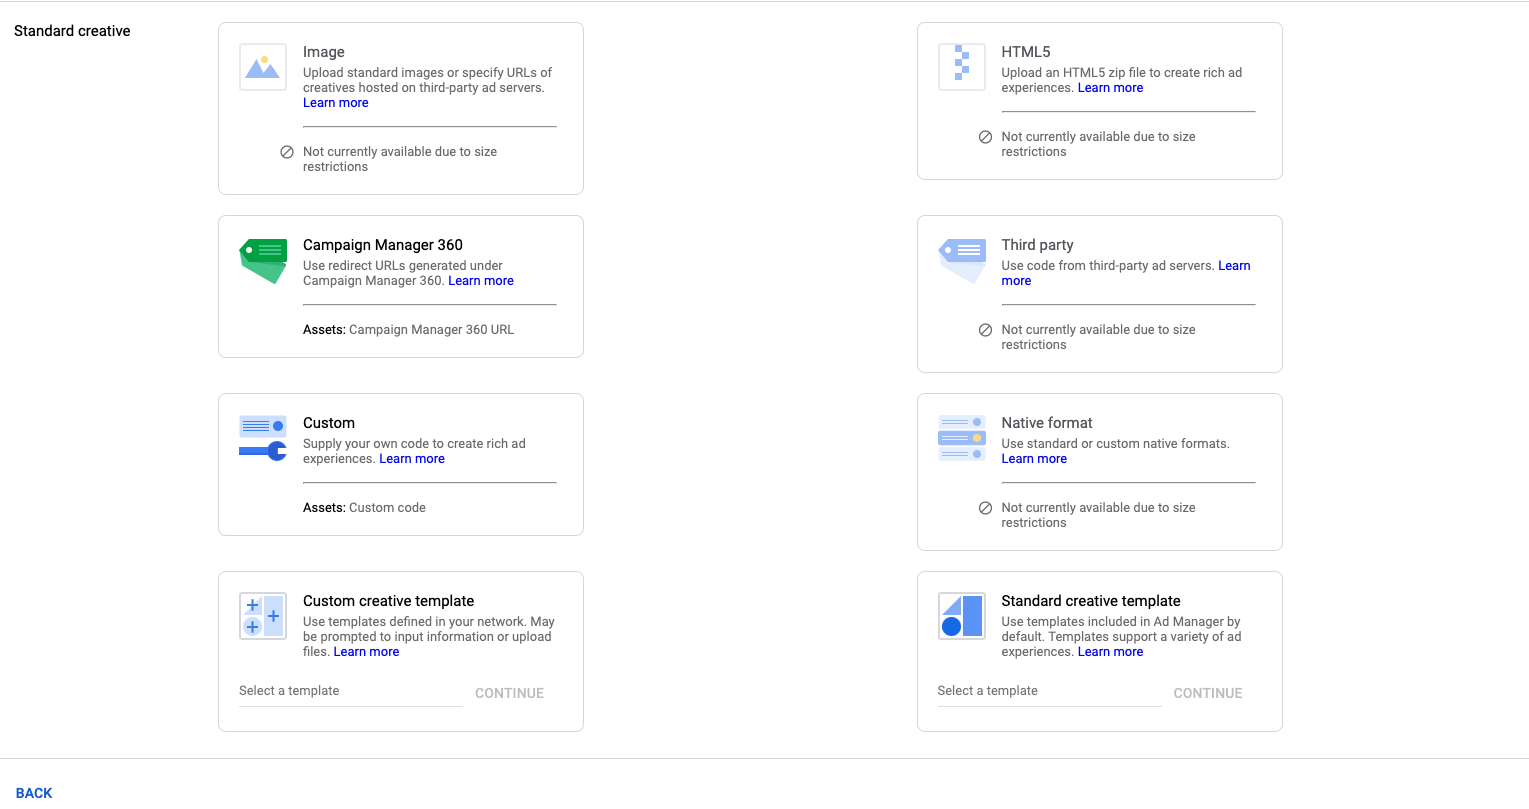
Having completed all other line item settings (see: the Setting up line items section above), you will then need to add a creative. Please select “Custom” creative from the list.
-
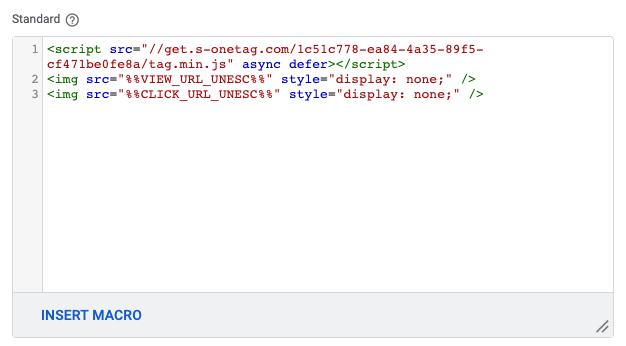
When adding the Connect tag to the Code Snippet section, you will also need to add in at least one macro. You will not be able to save the creative without doing this. The mandatory macro to add is the View impression macro. This is needed for GAM to track line item impressions to the OOP slot. The second macro you may add is the click tracker macro, which is optional. This allows GAM to track clicks. You do not need to track clicks in the Connect line item as clicks are being tracked on the reloaded creatives instead.
This is how it should look:
Implementing Signal via Google Tag Manager (GTM)
Another way of implementing the Signal tag is via GTM.
To deliver your Signal code via GTM, first, go to tagmanager.google.com.
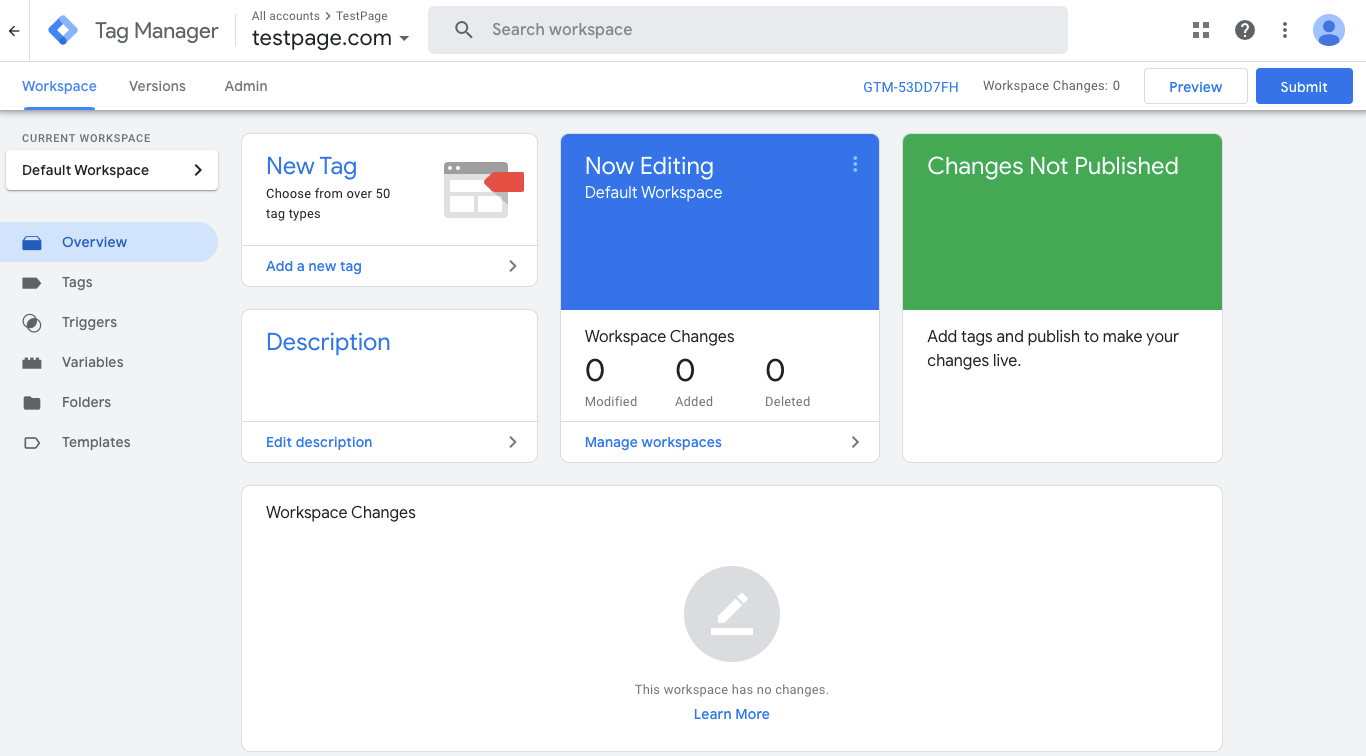
When you are on the Workspace page, click on the Overview Tab and then “Add a new tag”
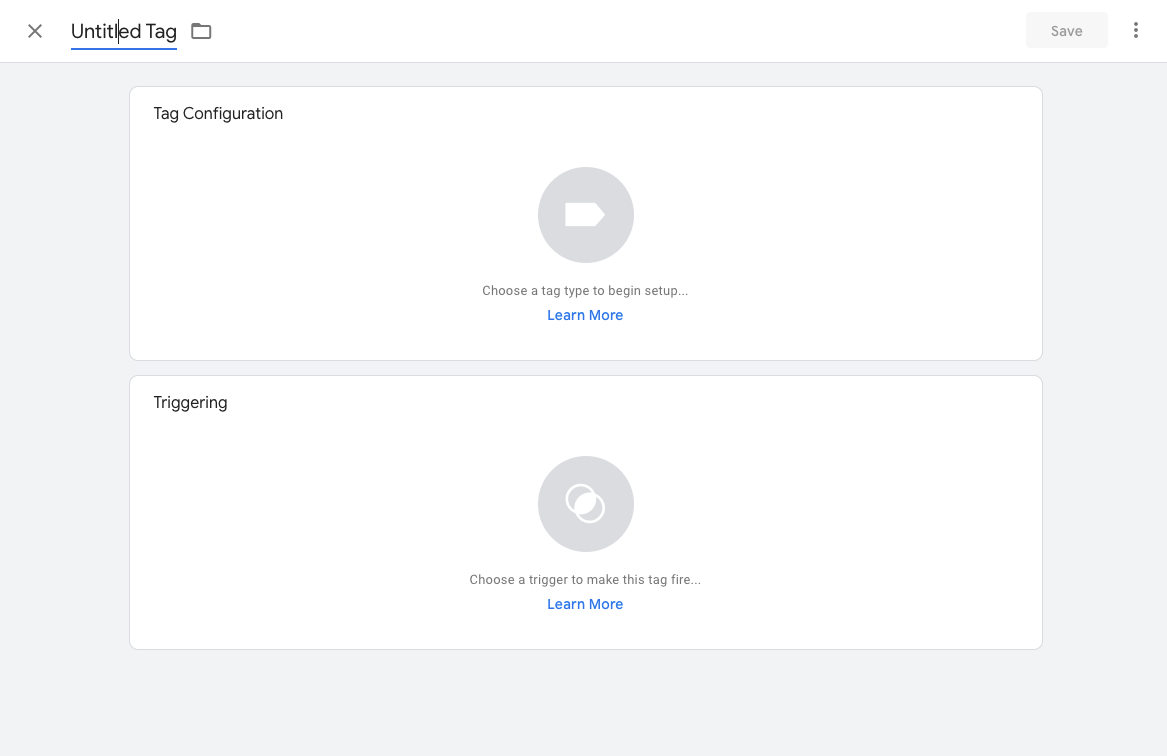
On the window that pops up, click on Tag Configuration
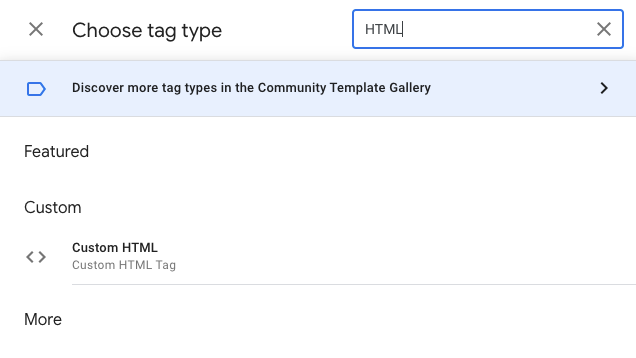
Then on the top right, click on the search icon and type “HTML.”
Select the custom HTML tag type.
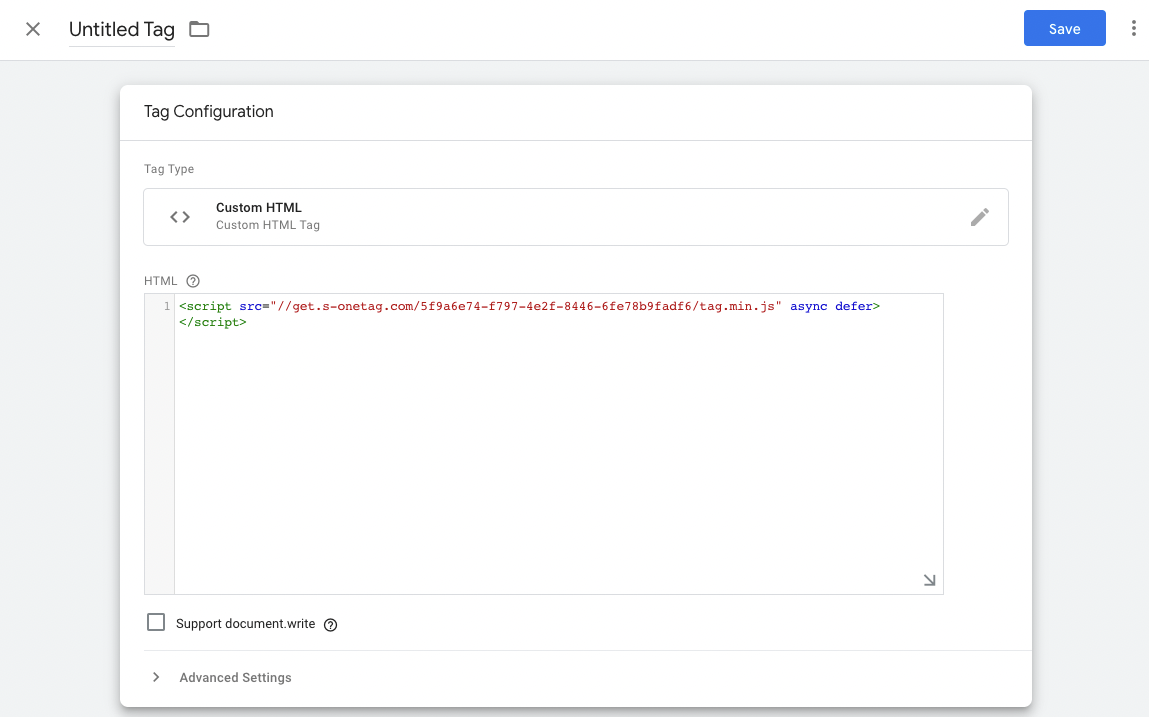
You are now able to pass the Signal tag.
It should look similar to this:
Then scroll down to choose a triggering method according to your preferences and save.
The last step is to install GTM on the page if you have not done it previously.
Simply click the GTM id under the main search bar and follow the instructions.
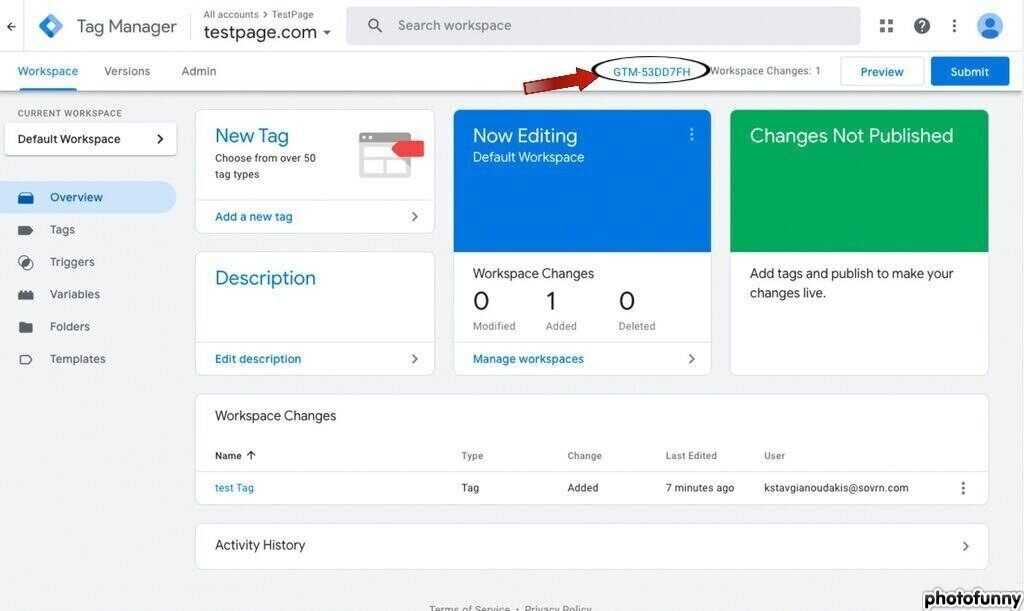
That's it! Enjoy.
Additional Resources
Here are some reference links from Google for more implementation-related information:
If you need more help, reach out to Sovrn Support.
